
 Toolbox
The new version, and what is in the box
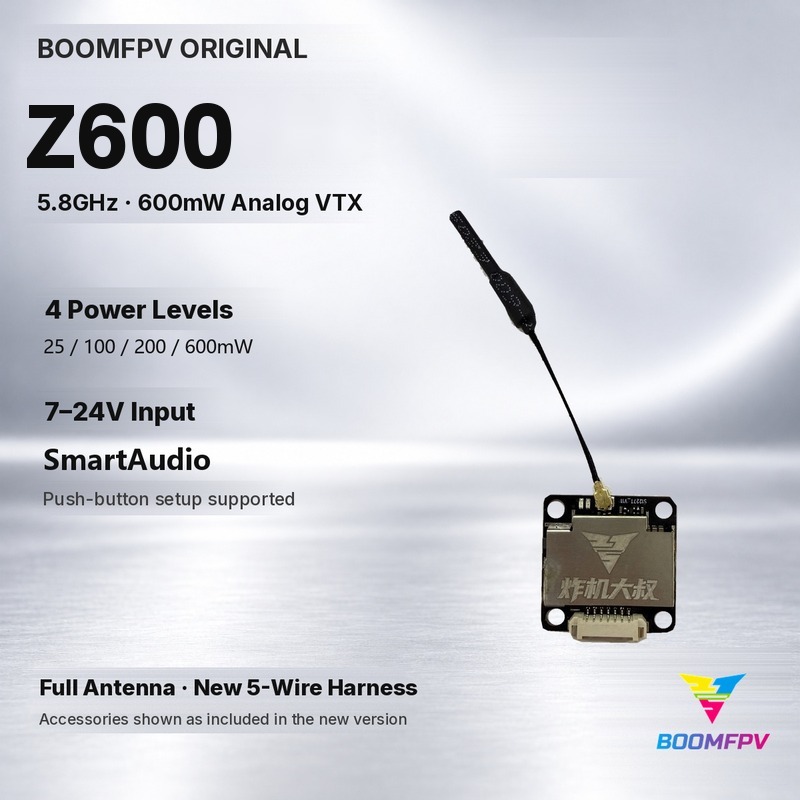
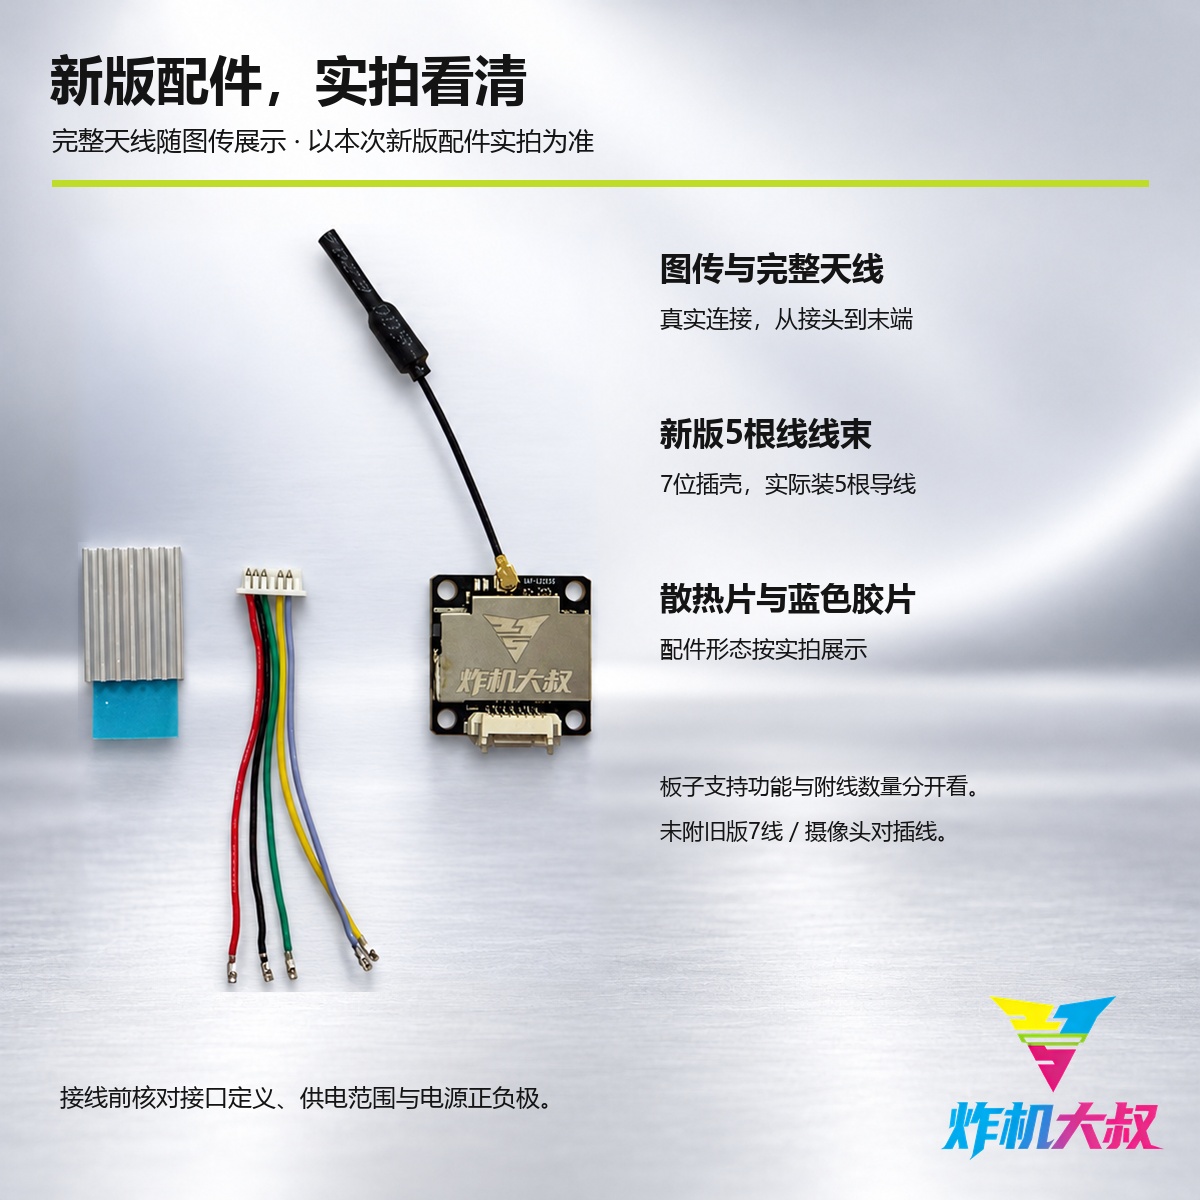
The Z600 is a 600mW analog VTX weighing 6.8g. The new-version harness has 5 conductors in a 7-position housing. Use the new-version photos on this page for the included accessories. Do not follow older notes about a 7-wire harness or a camera jumper lead.
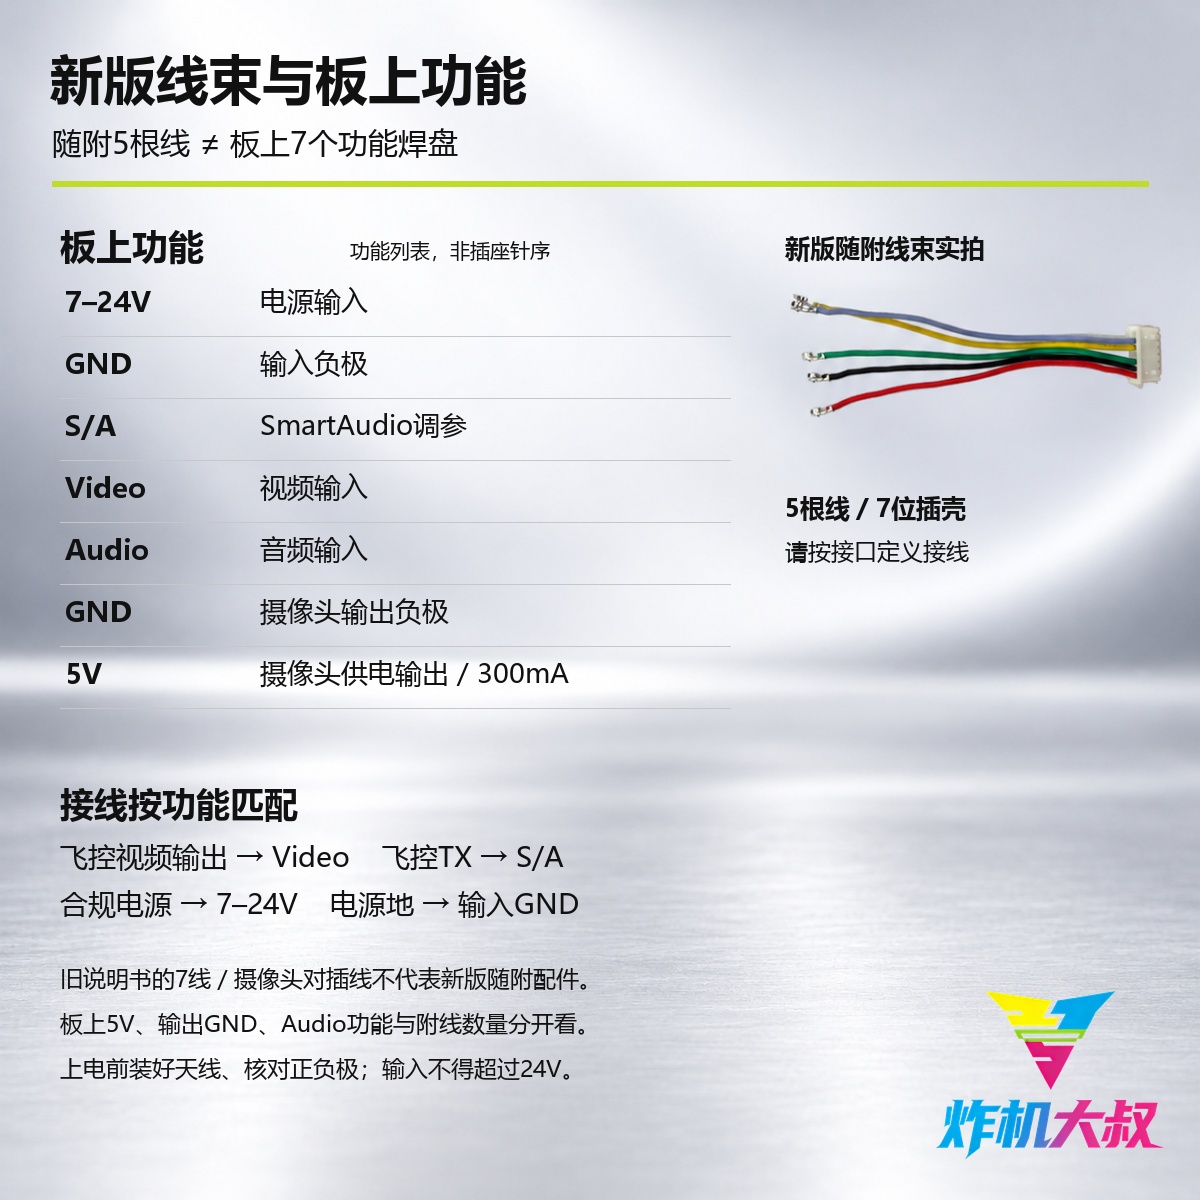
Pad labels are not the same as harness pin order
The board labels that can be confirmed are 7–24V, GND, S/A, Audio, Video, GND, and 5V. The 5V camera output is rated 300mA. The 7 function pads on the board and the 5 conductors in the included harness are not the same thing. Do not infer the front-of-housing pin order from the board labels or from photos. The unconfirmed blue-gray wire is not labeled here; check the actual board and confirmed documentation before you connect it.
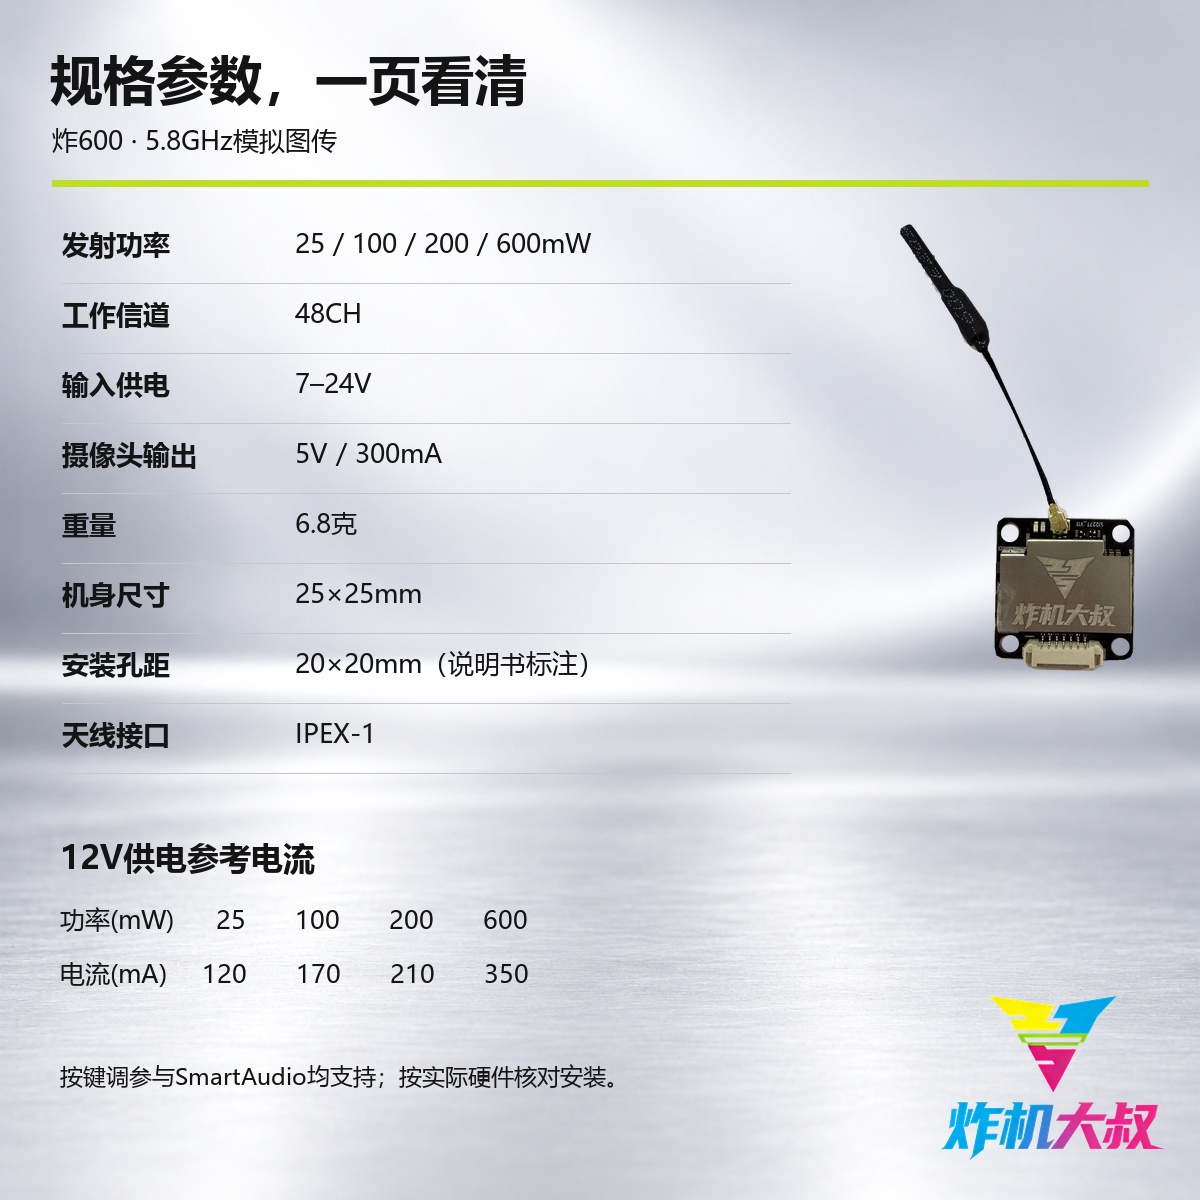
Specifications and power
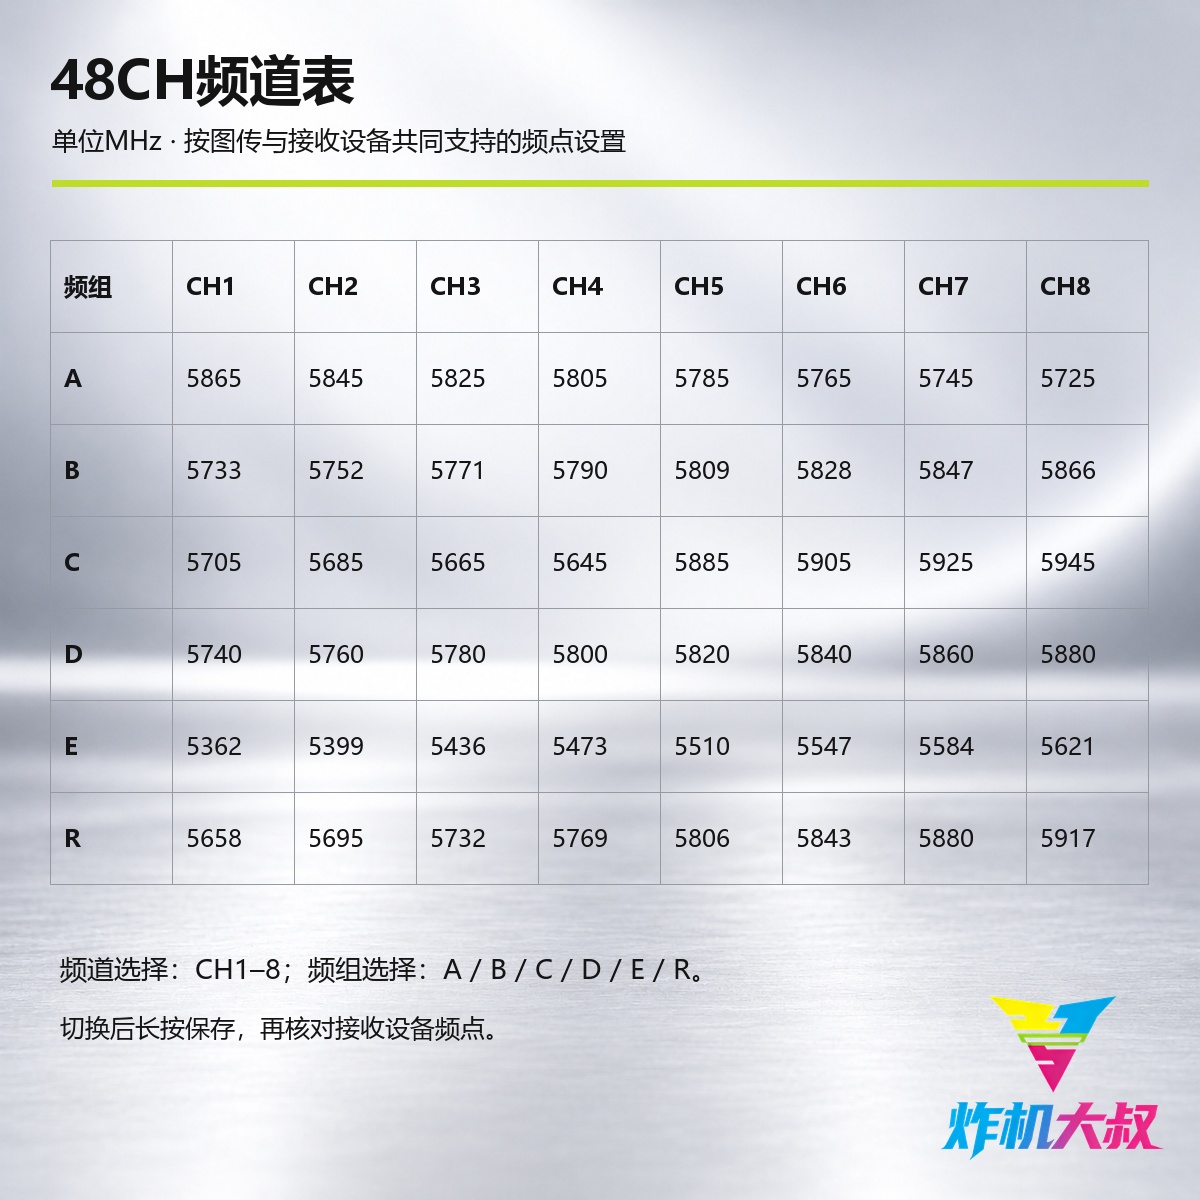
48CH; four levels at 25, 100, 200, and 600mW; 7–24V input; SmartAudio and button configuration; IPEX-1 antenna connector. The board is 25×25mm, with a 20×20mm mounting pattern and M3 holes. Reference current at 12V is 120, 170, 210, and 350mA in that order. Choose frequency and power to match your equipment, the site, and local rules.
Button setup and saving
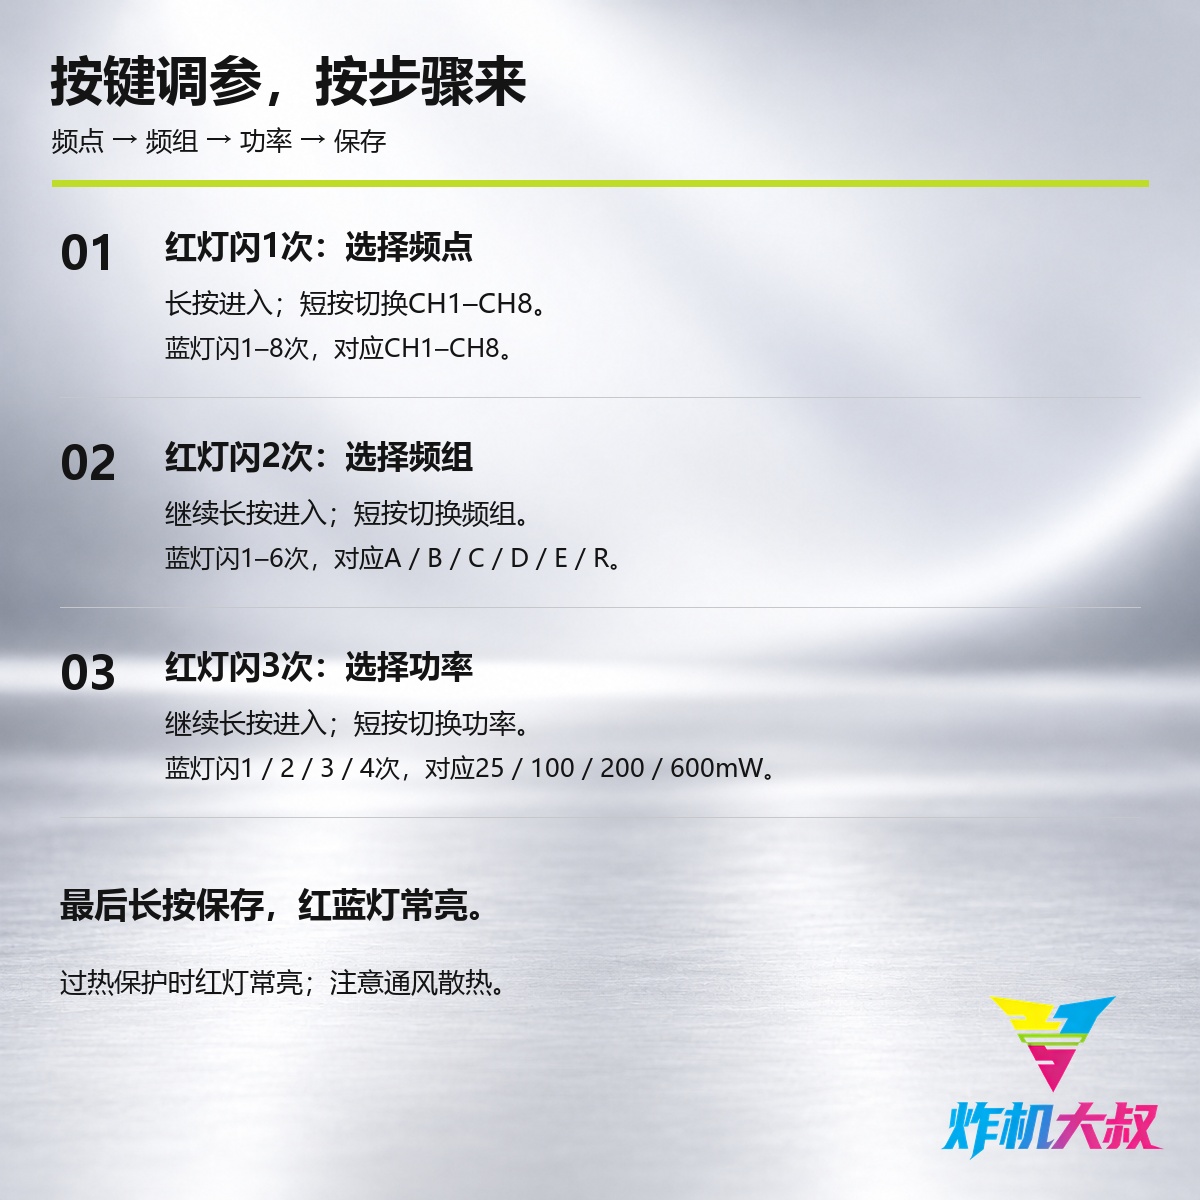
Hold until the red LED flashes 1 time to enter CH1–8, then short-press and count 1–8 blue flashes to choose the channel. Keep holding until the red LED flashes 2 times to enter bands A/B/C/D/E/R, then short-press and count 1–6 blue flashes to choose the band. Keep holding until the red LED flashes 3 times to enter 25/100/200/600mW power, then short-press and count 1–4 blue flashes to choose the level. Hold once more to save; the red and blue LEDs stay on.
PitMode and care
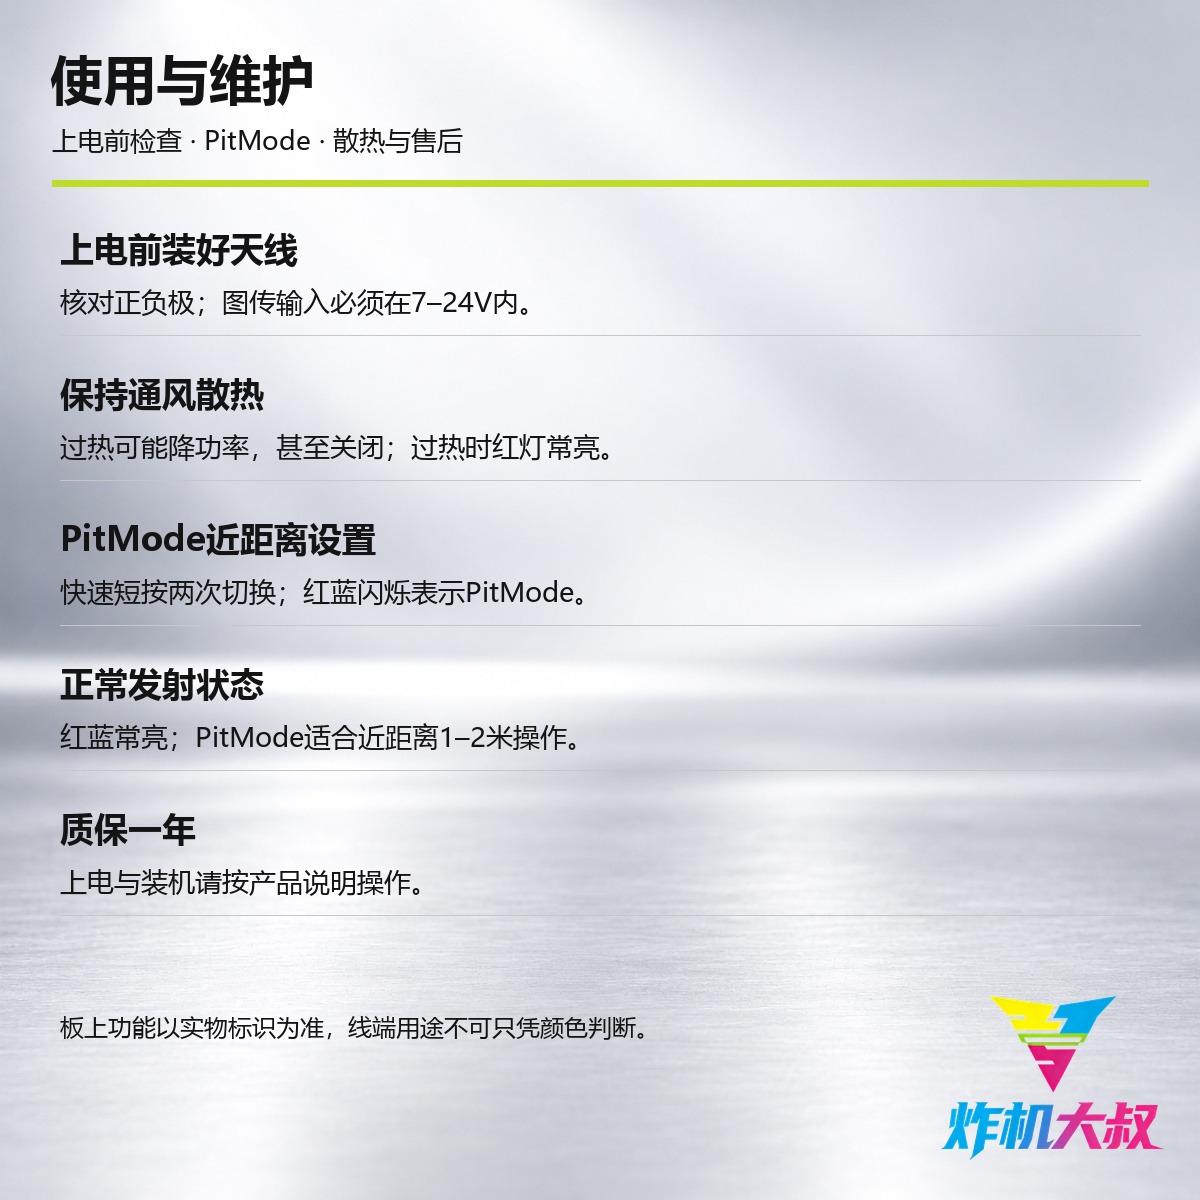
A quick double short-press toggles PitMode. Red and blue LEDs steadily on means normal transmit; red and blue flashing means PitMode. The manual describes this as a 1–2 m close-range operation; do not read that as absolutely zero RF. The red LED stays on if over-temperature protection is active. Install a matching antenna, check power polarity, and keep the VTX ventilated before you apply power. Warranty is one year. That is not a promise of an unconditional replacement.